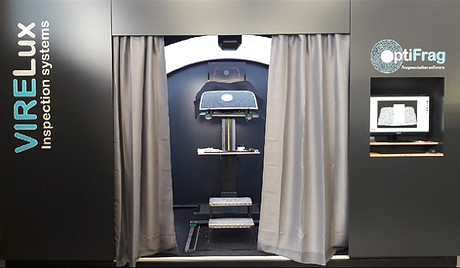
Fragmented Glass Measuring System
Optifrag, winner of the FEDIL innovation prize in the category ''SME''
What’s more, the quality and quantity of data generated by the computer-based process offers a unique insight into the tempering process that cannot be achieved using a traditional method.
The OptiFrag station uses the ECE R43 standard as its framework for analysis, but can include any other international standard, providing a unique comprehensive result report that immediately includes all requested tests

The OPTIFRAG audit station quantifies glass fragments through advanced phase shifting deflectometry, a process which analyses the light reflected by the fragmented surface.
This technology introduces significant improvements over legacy solutions as it eliminates the current need for photosensitive paper film, and allows the measurement of fragments directly on the inspected surface, including tinted glass and areas with serigraphy.
Furthermore, the results are not impacted by defrosting wires, or folds in the plastic film (often used to maintain the fragments in place). In addition, the computerized process encourages cost-savings by migrating the storage of results from physical to digital archives.

OptiFrag fragment density measurement

OptiFrag result map highlighting fragments according to fragment size.

OptiFrag result map highlighting fragments according to fragment size.

OptiFrag fragment density measurement

Following 5 decades of technological stagnation, VIRELUX revolutionized fragmentation testing. Introducing digital automation to an outdated manual process.
Traditional Method :
Manual fragment counting on paper film
OptiFrag Equipment :
Automated measurements directly on the surface of the inspected glass


OptiFrag System
Traditional Method
Objective, repeatable measurements
Complete measurement cycle time of
less than 3 minutes
Tinted areas = measurable
Serigraphy areas = measurable
Defrosting wires = no impact
No photosensitive film & ammoniac-based development process required
Total Fragment Count
Statistical exploitation of results
Inexpensive digital archiving
Comprehensive report of all measured standards
Density map of the entire glass allows unique insight into the tempering process
Subjective measurements
Complete measurement cycle time of
more than 15 minutes
Tinted areas = not measurable
Serigraphy areas = not measurable
Defrosting wires = create false segments
Photosensitive film mandatory, but dwindling world production creates an unsustainable product dependency
Only localized manual fragment count
No digital statistical exploitation of results
Bulky & expensive physical archiving
Each standard must be measured & verified individually
No density map & information of the tempering process
Automated Measurements
Manual Measurements
Metrology-based
Transmission-based
Digital Results
Paper-based Results
